MicroPython for Beginners
Table of Contents
Blinking LED
Blinking an LED is the equivalent of “hello world” program for embedded developers. The main learning objective of this exercise is to familiarise you with input/output on embedded boards using MicroPython.
I am fully aware of how dull my students find blinking bunch of LEDs. Bear with me for this lab and we will not only learn the syntax but also see what is possible by merely blinking LEDs.
The board we are using for our labs has plenty of LEDs for us to play with. Several general purpose input and output pins (GPIOs) e.g. GPIO0, GPIO1, GPIO2, GPIO3 etc. connected to blue LEDs. These LEDs are mainly for debugging purpose to show the status of GPIO. In order, to blink any of these LEDs, you just need to set the corresponding IO Pin to high or value 1. Let us try, following piece of code:
#import the module necessary to interact with GPIO
import machine

#declaration of Pin 1 as Output Pin
myPin = machine.Pin(1, machine.Pin.OUT)

#set Pin to be high
myPin.value(1)
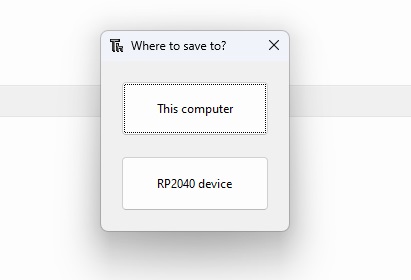
Once, you have written this code in Thonny IDE, save it as main.py on the RP2040 device. When you try and save your script, the IDE should ask you where you want it saved using the popup as shown below. Use RP2040 as the option.
In MicroPython, the machine module provides functions to interact with the hardware directly. Several functions provide access to hardware peripherals, e.g. timers, CPU clock, buses etc. Use this module incorrectly and it unleashes the wrath upon your hardware. Here is the link to the documentation for the details.
In the above code, all we are doing is declaring a variable which holds an instance of the Pin in this case its GPIO1. We declare this pin to be the output pin. We then set the value to 1 to make sure that Pin is supplied 3.3V.
Something to try
Can you try changing myPin.value(1) to myPin.value(2) and then myPin.value(False). Before you are able to save the changes, press the red glaringly obvious stop button in Thonny IDE to stop current code in the firmware running. Can you explain in your own words, what happens when you make these changes?Timers
Let us be honest, I promised we will blink the LED but all we have done is set the LED high. To an LED blink, we need to toggle the pin between high and low. The easiest way is to set the pin high and reverse to low state after a certain duration the wait a while to revert back to high state. Enter the realm of timers, what I mean is that now we need to bring our best friend timers into our code. Let us try the following code snippet
#import Pin from machine Module
from machine import Pin
#import time
import time

myPin = machine.Pin(1,Pin.OUT)

while True: #Keep running this piece of code for ever
    myPin.value(1) #You can also use myPin.high()
    time.sleep_ms(1000) #You can also use time.sleep(in sec)
    myPin.value(0) #You can also use myPin.low()
    time.sleep_ms(1000)
Essentially, in this code we run an infinite Loop. Within this loop, we set the pin high and low with moments of nap interleaved between them. Let us further explore the syntax and type of loops available in MircoPython.
Something to Ponder
If I was to put a scope on the GPIO1, what will I observe on the scope? Can you draw this on a piece of sheet? What other instances you can think of where this waveform can be used?Loops
Loops are programmer’s best friend to simplify repetitive tasks, e.g. going through a list of objects (often stored as array/dictionary). There are different types of loop semantics once frequently encounters:
- Keep doing something till a certain condition is met
- Iterate through something or repeat the tasks for a certain number of time
This first scenario is better handled by while loop, and the second by for loop. An expert programmer can use even a single construct to do both semantic jobs but that is just showing off .Let us look at couple of examples for loops:
#initialise a variable t with some value
t = 1
for y in range(1, 5):
    t=t*y

print(t)
Let us walk through this code, we initialise a variable called t with a value 1. Then we create another variable y. We specify that range for iterating over this y variable is between 1-5, i.e. 1,2,3,4. So first iteration y is initialised as 1, second iteration its 2 and so on. Each time we multiply t with value of y and modify initial value of t to be this new value. At the end, we just print the value. Can you guess what this simple piece of code does,…….., yes it calculates a 4!. So let us go ahead and see how we create a simple factorial function in MicroPython
# Let us just add function definition and add space before the first line
def factorial(a):
    t = 1
    for y in range(1, a+1):
        t=t*y
    return t

#Call the function and print whats returned directly
print(factorial(4))
Next, let us look at quick example of doing same thing but with a while loop.
#Let us define variable and the counter
t=1
y=1
while y<5:
 t=t*y
 y+=1

print(t)
Conditional Statements
Life is all about making choices, our choices take us through different pathways. The ability to make these choices is necessary for an embedded programmer. To that end, it is important to understand how to implement conditional statements which define which parts of code executes and when:
speed = 10
target = 50
if speed < target:
    print("Going at snail's pace")
elif speed > target:
    print("In a rush")
else:
    print("Keep calm and carry on")
Data Structures
Python has wonderful set of data structure. All you need to do is select appropriate ones for your task.
Lists
A data structure ordered collection of items
nList = ['4g', '5g', 'wifi', 'ble', 'nbiot']
print(nList[2])
Dictionaries
A dictionary is collection of key and value. We can use keys to find corresponding values.
address = {'IPv4':'192.168.1.0','IPv6':'None','Mac':'What is that'}
print(address['IPv4'])
Tuples
Another way to store values in a variable which cannot be changed after creation is through tuples.
color=(255,0,0)
print(color)